Recycled crafts are hugely popular and there are so many items you can use – for example leftover wine corks. Transforming them into adorable items like giraffes, owls and even toadstools . You can even make bigger items such as a birdhouse or table runner. You could also make a special present by keeping the corks from bottles of wine you’ve shared with someone special and make them a sentimental gift. Handy items to have on hand include a hot glue gun, paint, googly eyes and pipe cleaners. If you don’t have a lot of corks you can purchase them online or just tell everyone you know that your making cork projects and ask if they could keep corks for you. It’s a fun craft to get kids involved with too. So check out these ideas and get crafting!
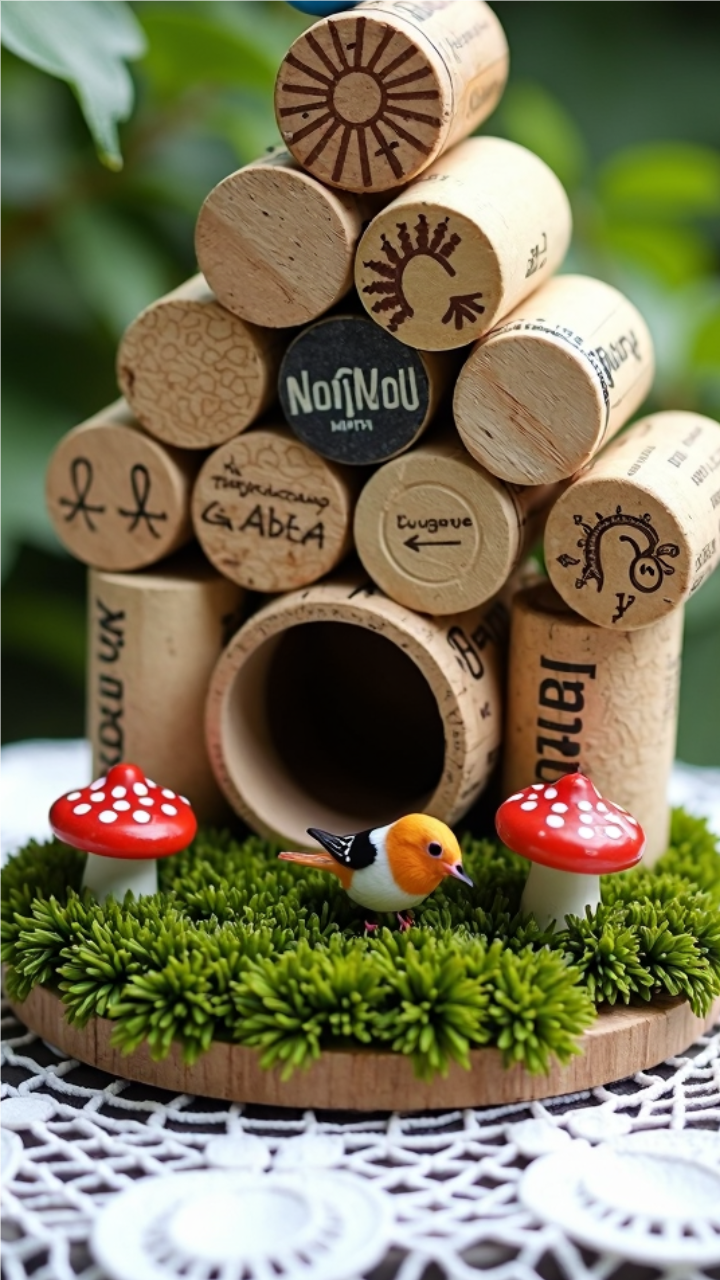
Purchase a wooden birdhouse and transform it into a Wine Cork Fairy House. You can paint a champagne cork to make the little toadstool. Add faux moss to give it a lived in look. How adorable will this look in your yard!
Supplies
- Wine corks (around 15-20)
- Hot glue gun & glue sticks
- Small round wooden base (or a sturdy piece of wood)
- Artificial moss or grass mat (for decoration)
- Miniature mushrooms or tiny figurines (for added charm)
- Craft knife or small saw (optional, for trimming corks)
- Small bird figurine (optional but adorable!)
Instructions
Start with a small wooden round or flat piece of sturdy wood as the base.Attach artificial moss or a grass mat onto the base using hot glue to create a natural look. Arrange the wine corks in a circular shape, stacking them to form a small tunnel-like opening. Use hot glue to secure each cork in place, ensuring a firm hold. Create a triangle shape at the top by stacking corks, forming a cute peaked roof.Place a tiny bird figurine near the entrance to make it look like a real bird’s home. Attach small decorative mushrooms, twigs, or pebbles around the house for a whimsical touch.
If you want a hanging birdhouse, attach a sturdy twine or ribbon at the top.
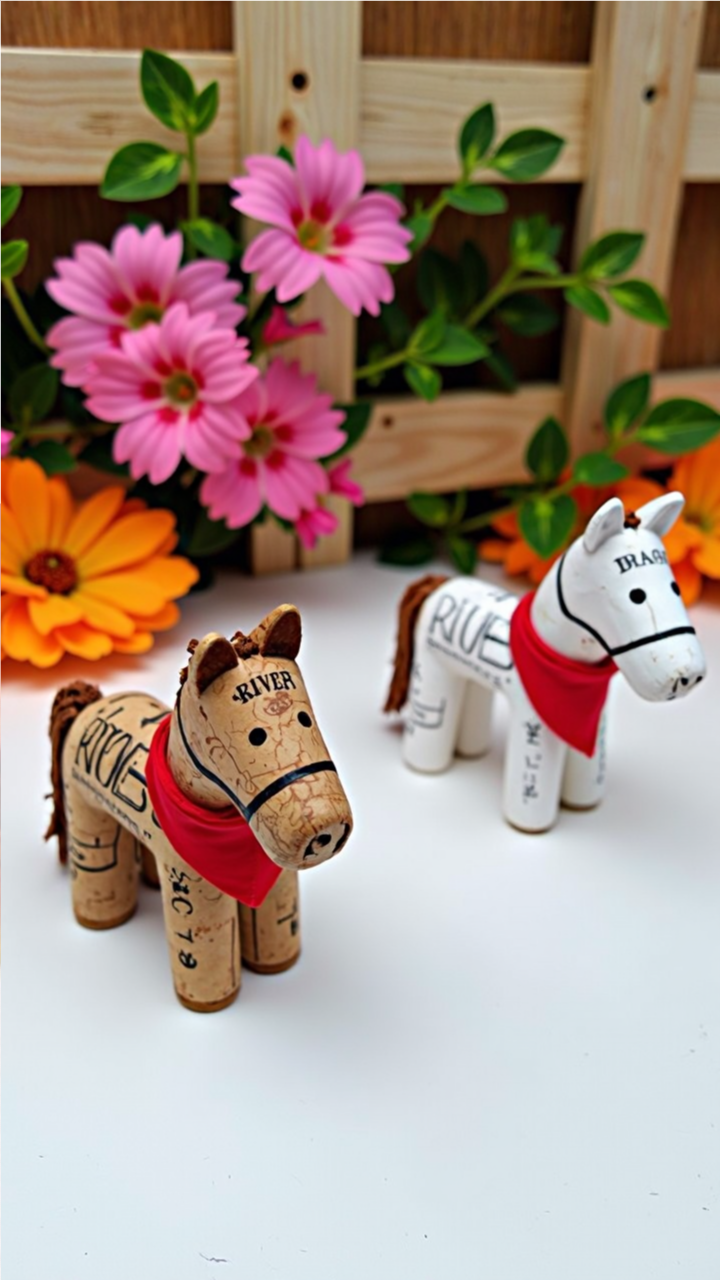
Giddy up ! How cute are these Horses! You can use push pins for the eyes and yarn for the manes. A little cloth is cut up to make their scarves.
Supplies
- Wine corks (4 for the legs, 1 for the body, and 1 for the head)
- Hot glue gun & glue sticks
- Small piece of twine or yarn (for the tail and mane)
- Black marker or paint (for facial features)
- Tiny fabric scraps (for a scarf or saddle decoration)
- Craft knife or small saw (to cut the corks)
- Toothpicks or small wooden dowels (for reinforcement)
Instructions
Take one full wine cork and use it as the body of your horse. Cut four smaller pieces from wine corks for the legs (you can leave them full size or trim them to match).Secure the legs onto the body using hot glue. For extra stability, insert small wooden dowels or toothpicks between the joints before gluing.Take one wine cork and slightly trim it at an angle to resemble a horse’s head. Use hot glue to attach it securely to the body. If needed, use a toothpick between the head and body for extra support. Cut small strands of twine or yarn and attach them along the top of the head and down the neck to create a mane.
Glue a small bunch of twine/yarn at the back for the tail. Use a black marker or paint to draw eyes, nostrils, and a mouth on your horse’s face.
Cut small fabric scraps into a triangle and tie it around the horse’s neck like a bandana or scarf.
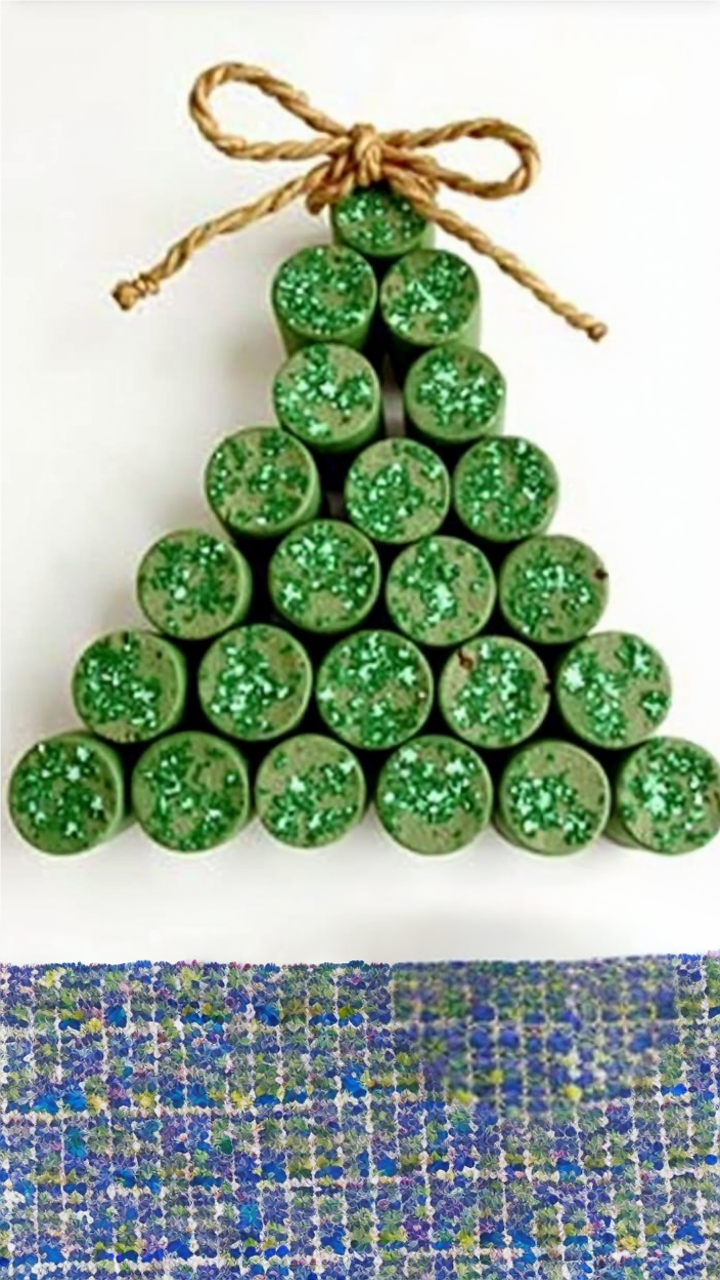
This Wine Cork Christmas Tree is the perfect DIY project to get into the festive spirit while repurposing old wine corks..
Supplies
Wine corks (at least 15–20, depending on size)
Green acrylic paint or spray paint
Green glitter
Hot glue gun & glue sticks
Twine or ribbon (for hanging or decorating)
Small wooden star or bead (for the tree topper, optional)
Paintbrushes
Instructions
Start by painting one end of each cork with green acrylic paint and sprinkle green glitter over the wet paint before it dries.Lay out your corks in a triangle shape, starting with one cork at the top and adding more in rows beneath (2, 3, 4, etc.).You can also add one or two corks at the base to resemble the tree trunk.
Use a hot glue gun to attach the corks together. Attach a small wooden star, bead, or bow to the top of your tree. Tie a piece of twine or ribbon at the back to create a hanging loop if you’d like to hang your tree as an ornament.
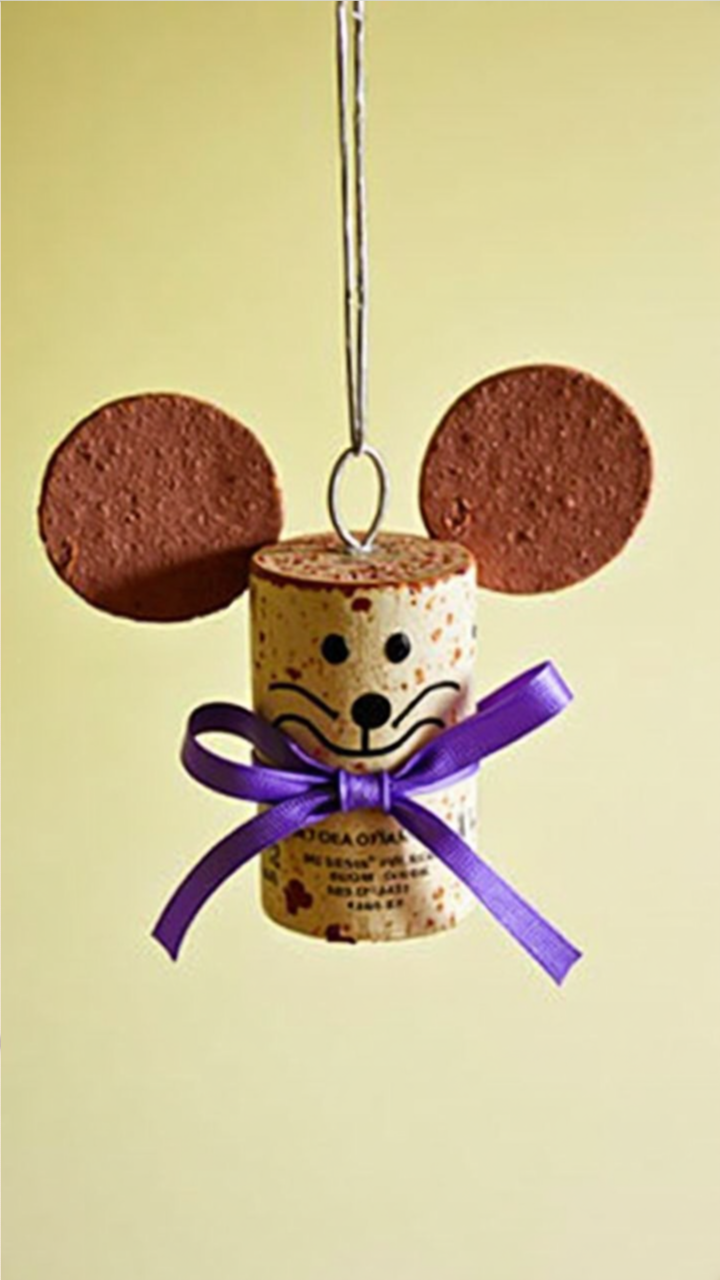
This Wine Cork Mouse Ornament is an adorable and budget-friendly project that’s perfect for the holidays or any time of the year.
Supplies
- Wine cork
- Brown craft foam or felt (for ears)
- Black fine-tip marker or paint (for face details)
- Small black beads or paint (for eyes and nose)
- Hot glue gun & glue sticks
- Purple ribbon (or any color of your choice)
- Paperclip or ornament hook (for hanging)
- Scissors
Instructions
If needed, clean and dry your wine cork before starting. You can leave it natural or lightly paint it with an off-white or beige color for a softer look. Cut two small circles out of brown craft foam or felt. Glue them to the top sides of the cork to form the mouse’s ears. Use a fine-tip black marker or paint to draw whiskers, a mouth, and facial details.
For the eyes and nose, glue small black beads or simply paint tiny dots. Tie a small ribbon bow and glue it just below the face to add a decorative touch. Attach a Hanging Loop
Straighten a paperclip and shape it into a small loop, then glue or insert it into the top of the cork.
Alternatively, use an ornament hook or string to create a hanging loop.