If you are attending a work party over the festive season the chances are you’ll need to bring a few little gifts. Save some money and get some inspiration from these awesome DIY Christmas Presents that you can give to colleagues and even neighbors.
1. Socks & Wine
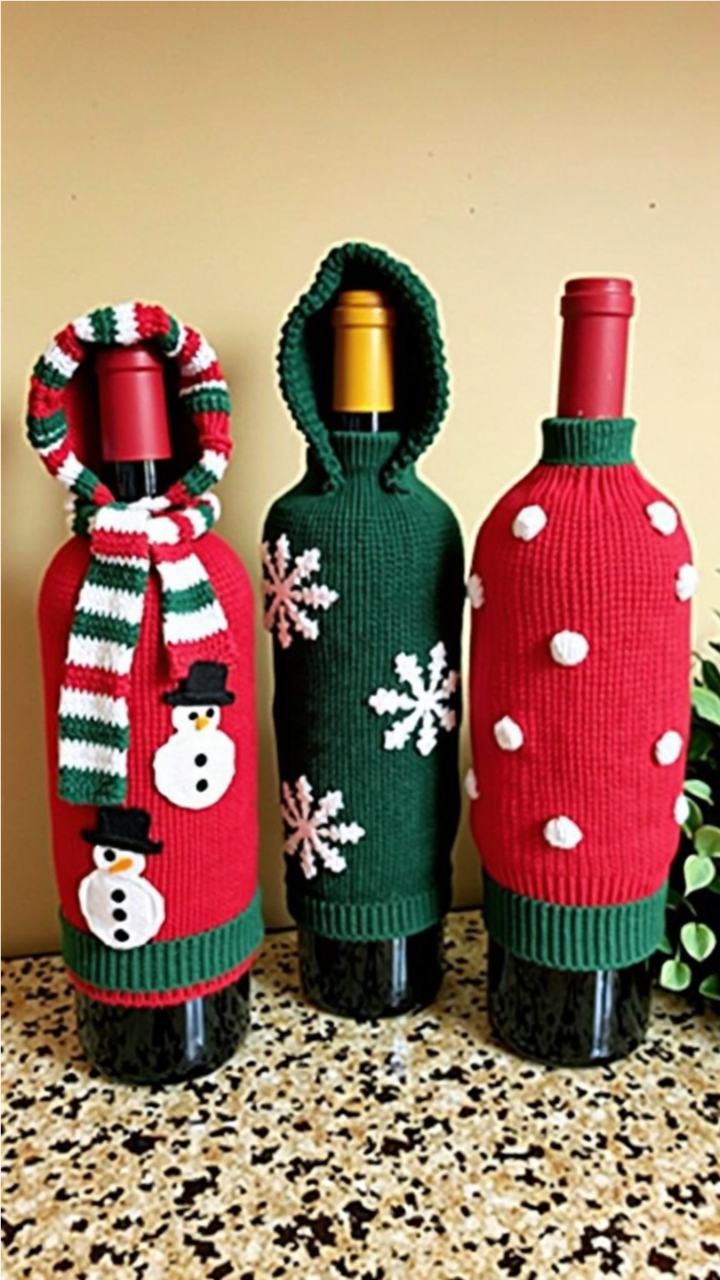
This gift will cost no more than $10 to make and could be used any time of the year.
Supplies
- Mini Sweaters or Bottle Covers: Purchase mini holiday-themed sweaters or knit your own.
- Felt Decorations: Snowmen, snowflakes, polka dots, or other festive shapes.
- Hot Glue Gun and Glue Sticks: For attaching decorations.
- Scissors: For cutting felt and trimming.
- Ribbon or Yarn: For scarves or additional embellishments.
- Wine Bottles: Any wine bottle to dress up.
Instructions
Use pre-made mini sweaters or repurpose old holiday sweaters by cutting and sewing them to fit wine bottles.Create tiny scarves from ribbon or yarn and wrap them around the bottle neck.
Add hoods, collars, or cuffs for a cozy touch.Slip the decorated sweater over the wine bottle. Adjust the fit and secure any loose edges with glue if needed.
2. For Your Mistletoes
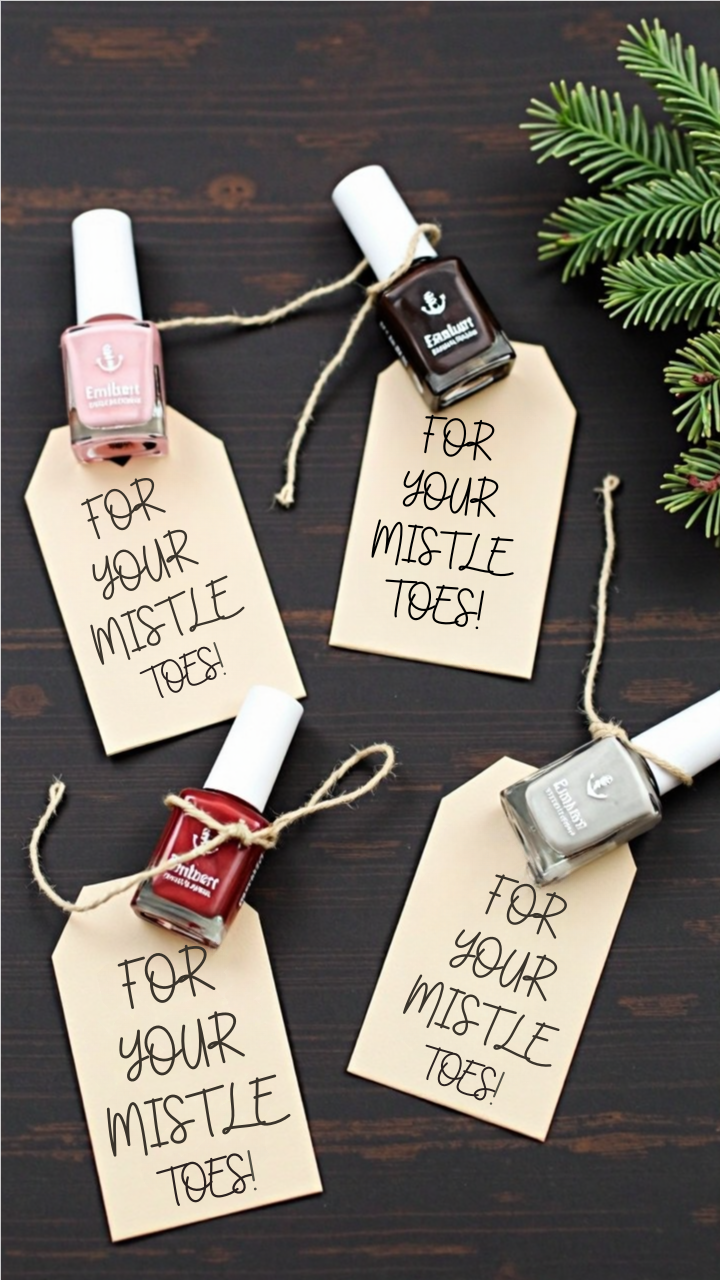
Purchase several nail polishes from the dollar store and write the words “For Your Mistletoes” on some cards to recreate this budget friendly gift idea.
Supplies
- Bottles of nail polish (holiday colors like red, green, gold, silver, or nude tones work great)
- Gift tags (pre-made or DIY using cardstock)
- Twine or ribbon
- A marker or calligraphy pen (to write the message)
- Hole puncher
Instructions
Choose Your Nail Polish – Select a color that fits the holiday spirit or the recipient’s personality.
Prepare the Gift Tags – Write “For Your Mistle-Toes” on the tag in a fun, festive font. You can print, handwrite, or use calligraphy for an elegant touch.
Punch a Hole – Use a hole puncher to create a hole at the top of the tag.
Attach the Tag – Thread twine or ribbon through the hole and tie it around the neck of the nail polish bottle.
Add Extra Decorations (Optional) – Consider adding small bells, tiny pinecones, or holly embellishments for a little extra holiday charm.
3. S’mores Kit
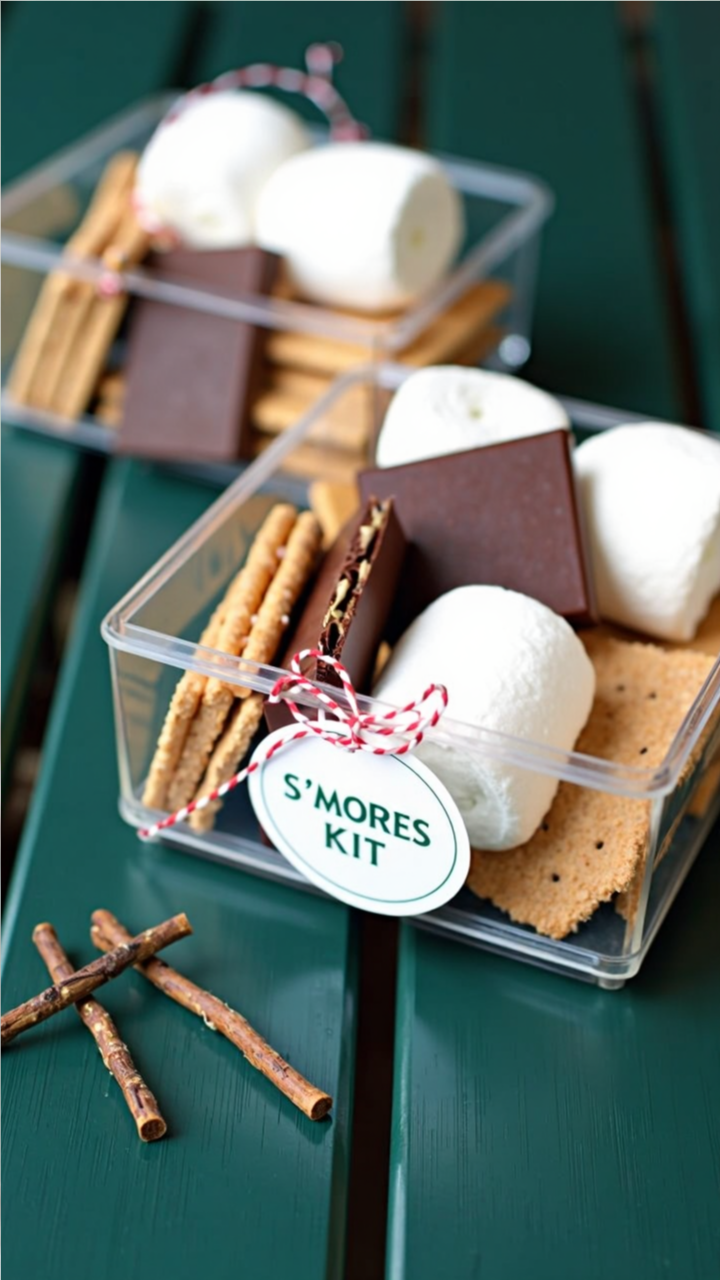
You can recycle some old containers to make this yummy S’mores gift complete with marshmallows, Graham crackers and chocolate.
Supplies
- Marshmallows
- Mini chocolate bars
- Graham crackers
- Small clear plastic boxes or treat bags
- Twine or ribbon
- Printable “S’mores Kit” labels (or DIY tags)
Instructions
Place 4 graham crackers in the box or bag, making sure they lay flat to prevent breaking.Add 2 squares of chocolate on top of the crackers.
Place 2 large marshmallows inside. If using a clear plastic box, arrange everything neatly so that all ingredients are visible.
If using a treat bag, carefully stack the ingredients and seal the bag securely.
Add a Personal Touch Tie the box or bag with twine or ribbon. Attach a cute handmade or printed “S’mores Kit” tag.
4. Twizz the Season
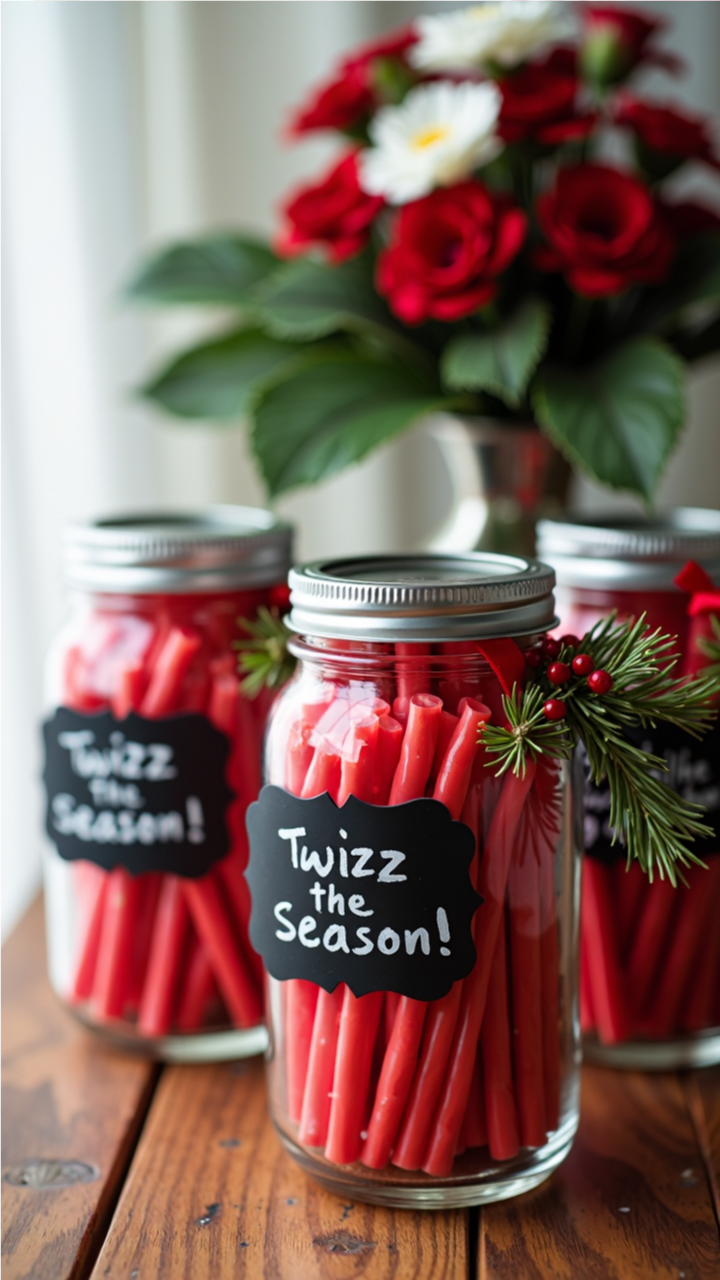
If your colleagues love the licorice treat – then this is the perfect gift for them.
Supplies
- Mason jars with lids (any size, but pint-sized works best)
- Red Twizzlers or other red licorice candy
- Black chalkboard labels or cardstock tags
- White paint pen or chalk marker
- Small holiday decorations (mini pine sprigs, berries, ribbons, etc.)
Instructions
Start by unwrapping your Twizzlers and placing them neatly inside the mason jars. If necessary, cut them to fit your jar size. Fill each jar to the top for a full and festive look.
Using black chalkboard labels or cardstock tags, write the phrase “Twizz the Season!” with a white paint pen or chalk marker. Let the ink dry completely before handling. If using cardstock, punch a hole in the top to thread ribbon through later. Stick the chalkboard label directly onto the jar, or use a ribbon to tie a cardstock tag around the jar lid.
5. Christmas Treat Jars
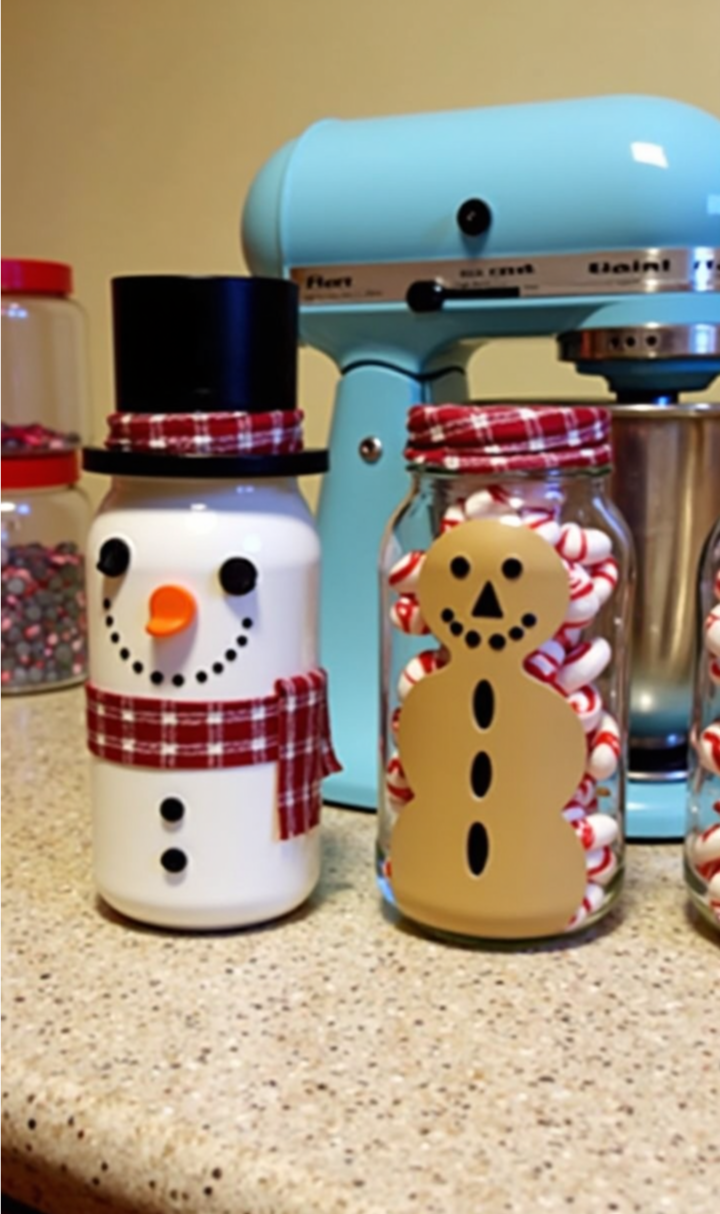
These DIY Christmas treat jars, designed to look like a snowman and a gingerbread man, are a fun and creative way to share sweet treats with friends, family, or coworkers. Not only are they adorable, but they also make for thoughtful, budget-friendly presents.
Supplies
- Empty glass jars with lids (mason jars or recycled jars work great)
- White and tan acrylic paint (for snowman and gingerbread man)
- Black and orange buttons (for eyes and nose)
- Black permanent marker or paint pen
- Red and white fabric scraps (for scarves and jar lids)
- Hot glue gun and glue sticks
- Peppermints, marshmallows, or small holiday candies
Instructions
Snowman Treat Jar
Paint the Jar: Start by painting your jar white. Apply 2-3 coats for an even look, letting each coat dry completely.
Create the Face: Use black buttons or a paint pen to add two eyes. Draw a dotted smile with a black marker. Attach a small orange button or a painted wooden bead for the carrot nose.
Decorate the Lid: Cut a piece of red and white checkered fabric to cover the lid, securing it with glue or a rubber band.
Add a Scarf: Tie a strip of matching fabric around the neck of the jar to create a cozy scarf.
Fill with Treats: Once everything is dry, fill your jar with white candies like marshmallows or peppermint bark.
Gingerbread Man Treat Jar
Paint the Jar: Apply tan acrylic paint to your jar, covering it evenly.
Create the Face and Buttons: Use a black paint pen or permanent marker to draw two eyes, a triangle nose, and a dotted smile. Glue on black buttons down the front.
Decorate the Lid: Cover the jar lid with red and white checkered fabric, just like the snowman jar.
Add Treats: Fill the jar with red and white peppermint candies, cinnamon candies, or gingerbread cookies.