Valentines Wine Bottle Crafts not only do they make great centerpieces or vases – they are perfect for adding some romantic decor to your home. Up-cycle wine bottles with spray paint with primer, twine, and a bow for a very fancy look. Cut a heart shape with a cricut machine out of contact paper. Paint the bottom of the bottle first with a pink or red color. Then place the contact paper on the bottle (individual hearts up top, and the cutout strip at the bottom). Then spray with a light pink all over, leaving a strip of dark pink in the middle. Attach twine using a hot glue gun.
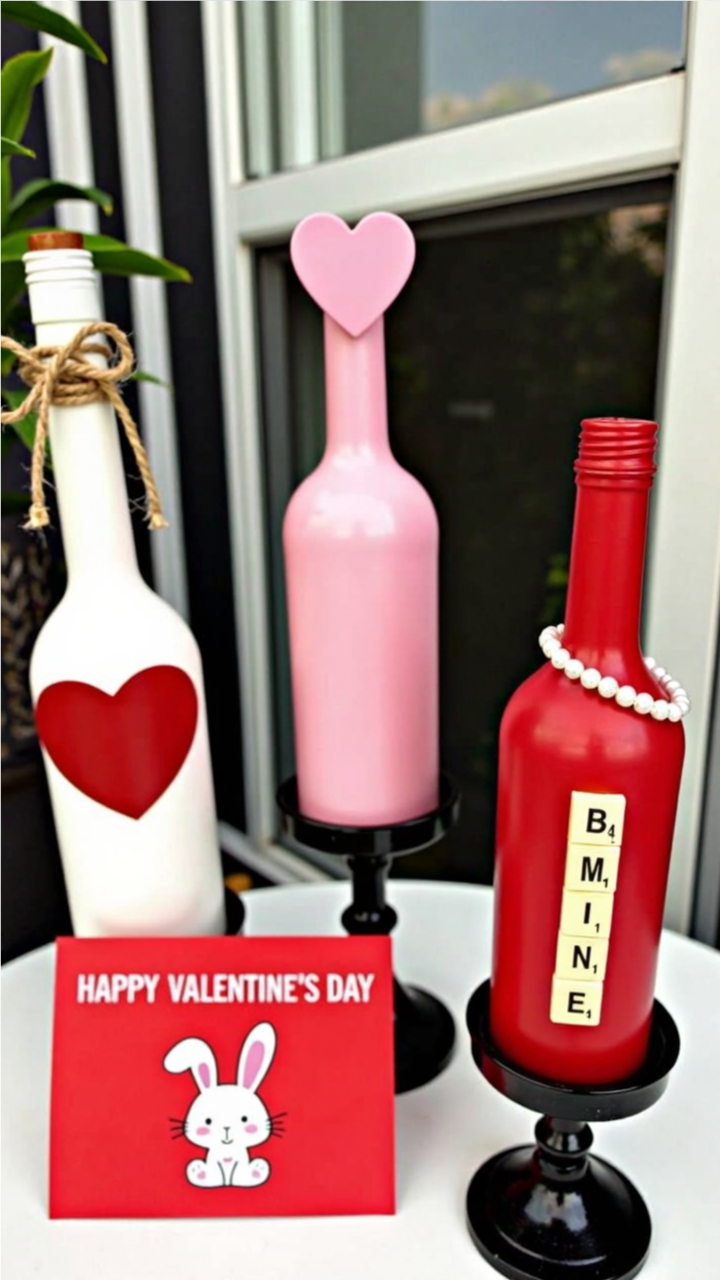
Wine bottles can be decorated to make fun decor for your home by including signs such as ‘be mine’ for Valentine’s Day for example.
Supplies
- Empty wine bottles
- Black, white, pink, and red matte spray paint
- Red, pink, and white acrylic paints or adhesive vinyl hearts
- Red string, twine, pearls, or ribbon
- Wooden heart cutouts (optional)
- Letter tiles (e.g., Scrabble tiles)
Instructions
Spray paint the bottles in black, white, pink, or red matte spray paint. Once dry, experiment with different designs—solid red or pink hearts, a minimalist single heart, or a glittery heart for extra sparkle. Attach wooden heart cutouts to the top of a bottle for added dimension.Glue letter tiles spelling out romantic words like “BE MINE” onto one of the bottles. Wrap pearls, twine, or ribbon around the neck of the bottles for an elegant touch. Let all embellishments dry completely before handling. Arrange the Bottles on Stands.
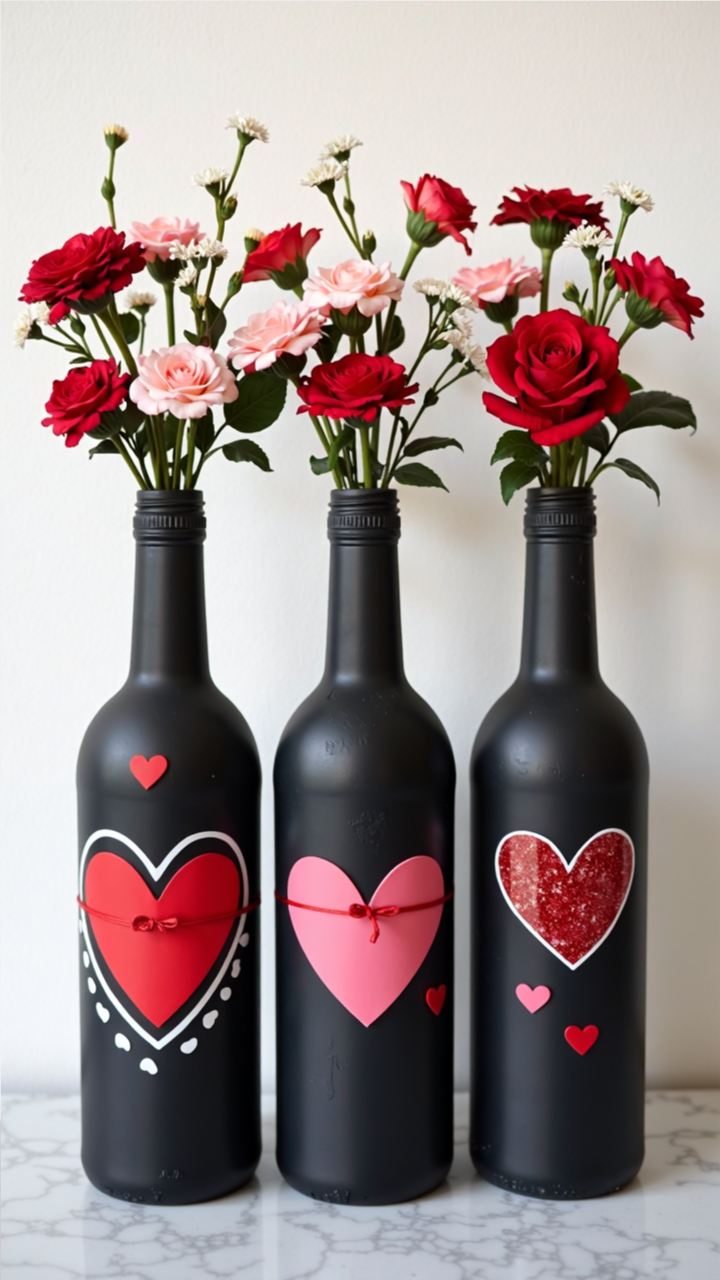
Make a lovely centerpiece with 3 bottles filled with flowers.
Supplies
- Empty wine bottles (cleaned and labels removed)
- Black matte spray paint
- Red, pink, and white acrylic paints or adhesive vinyl hearts
- Paintbrushes
- Red string or ribbon
- Hot glue gun (optional)
- Artificial or fresh flowers (roses, carnations, or baby’s breath)
Instructions
In a well-ventilated area, spray paint the bottles with black matte spray paint. Allow them to dry completely, then apply a second coat if needed for even coverage. Using acrylic paint or adhesive vinyl, create heart designs on the bottles. Once dry, add embellishments as desired such as a red string or ribbon around the middle of the bottle. Finally, add your flowers.
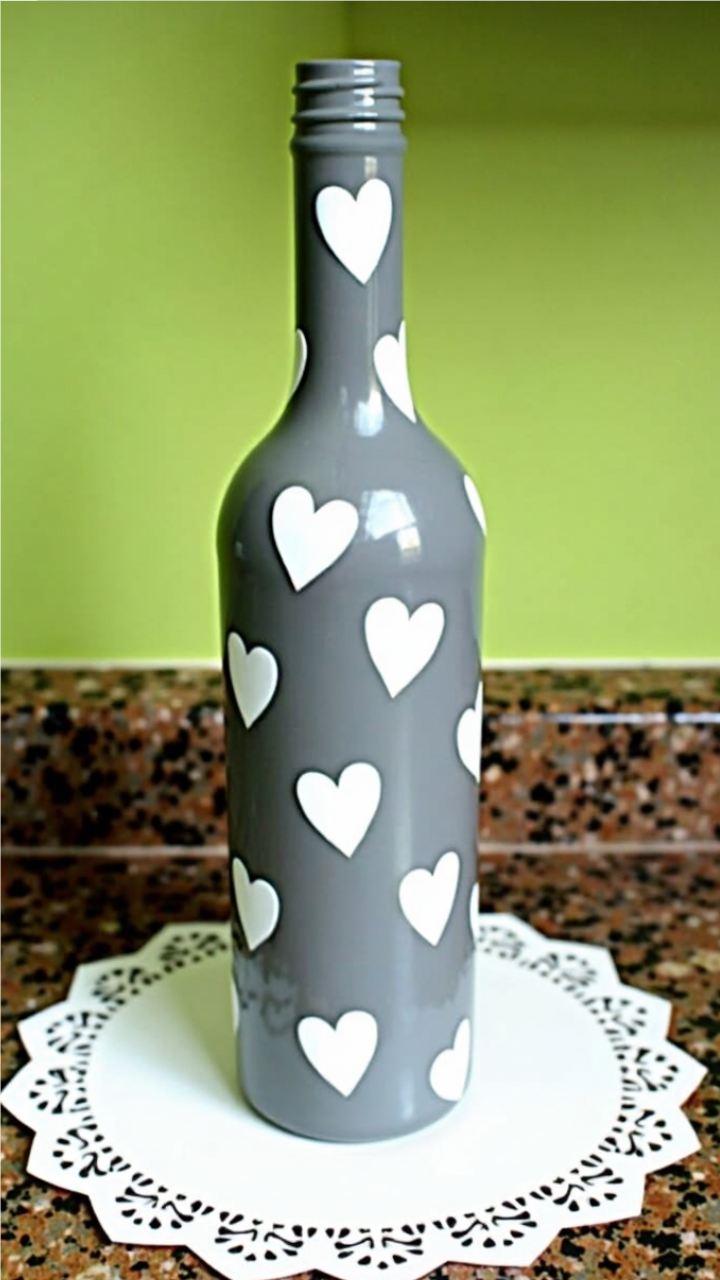
This dreamy bottle looks like floating heart clouds in a winter sky.
Supplies
- Empty wine bottle
- Acrylic paint (gray or your preferred base color)
- White acrylic paint (for the hearts)
- Paintbrushes (one for base color, one for details)
- Clear sealant spray (for a glossy finish)
Instructions
Using a large paintbrush, apply a coat of gray acrylic paint (or any color of your choice) to the entire bottle. Let it dry completely, then apply a second coat for an even, opaque finish. Allow to dry. Use a fine brush to paint white hearts directly onto the bottle. Protect your design and add a polished look by spraying the bottle with a clear sealant spray.
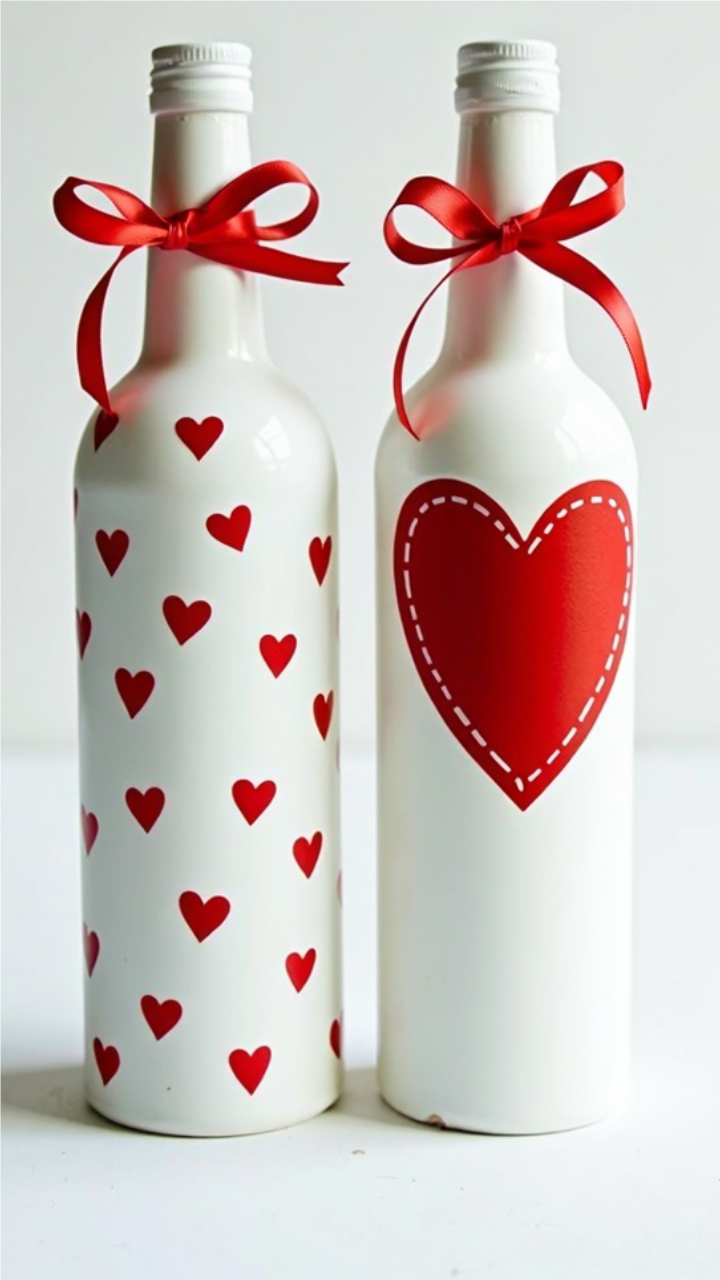
A bottle painted white with red hearts looks so delicate and inviting.
Supplies
- Empty wine bottles (cleaned and labels removed)
- White acrylic paint (for the base)
- Red acrylic paint (for hearts)
- Paintbrushes (one for base color, one for details)
- Heart-shaped stickers or stencils (optional)
- Fine-tipped paintbrush or paint marker (for stitched effect)
- Red satin ribbon (for finishing touch)
- Clear sealant spray (for durability)
Instructions
Apply a smooth, even coat of white acrylic paint over the entire bottle and allow to dry. Apply a second coat if needed. On one bottle use a fine brush to paint small red hearts all over. On the second bottle, draw or stencil a large red heart on the bottle, then add a faux-stitched effect around the edges using a fine paintbrush or white paint marker.
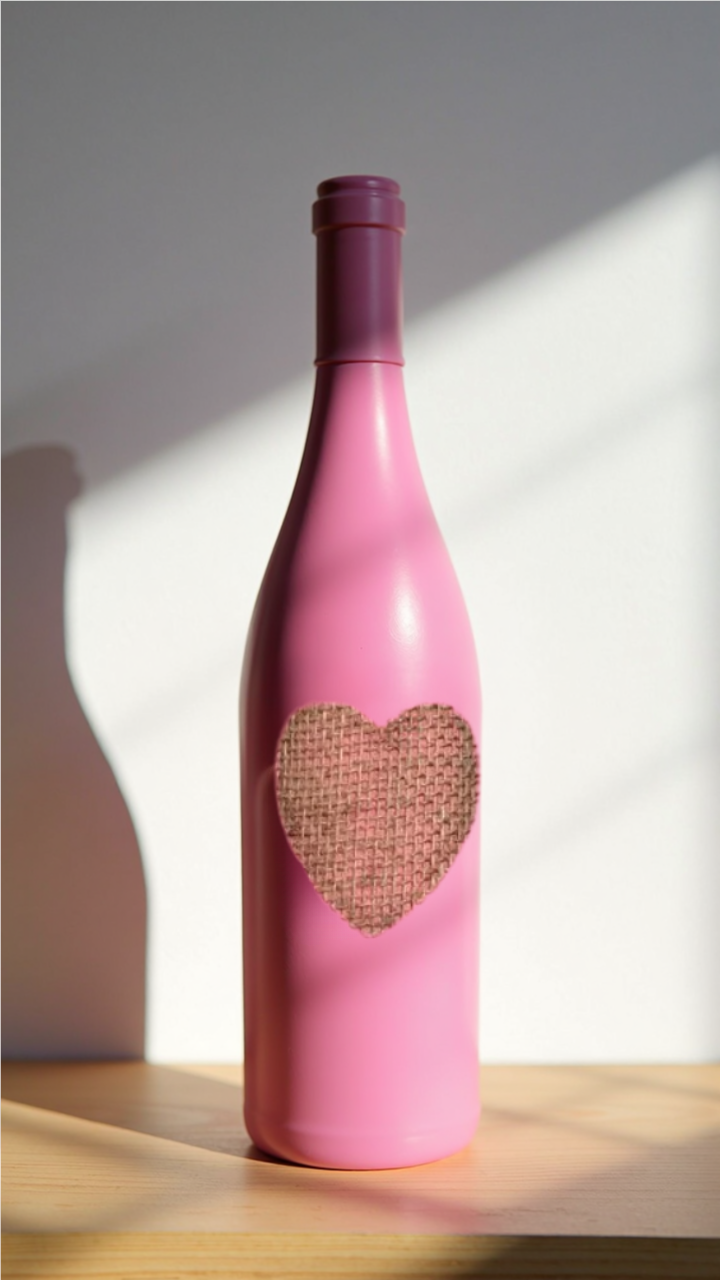
For a vintage look – paint a bottle in pink and add a burlap heart with a glue gun.
Supplies
- Empty wine bottle
- Pink acrylic or spray paint
- Burlap fabric
- Scissors
- Mod Podge or strong craft glue
- Paintbrush or sponge brush
Instructions
Paint or spray paint the entire bottle pink and allow it to dry completely. Let dry thoroughly.While the bottle is drying, take a piece of burlap fabric and cut out a heart shape. You can use a stencil or freehand it for a more natural, handmade look.Using Mod Podge or strong craft glue, carefully attach the burlap heart to the front of the bottle. Smooth out any wrinkles and press firmly to ensure it adheres well.