With October approaching, the nights grow darker, and Halloween excitement fills the air. It’s the perfect time to transform your front porch into a spooky masterpiece! These DIY Halloween porch decorations will set the scene for a frightful night and give every trick-or-treater a hauntingly fun experience.
1. DIY Hanging Bats
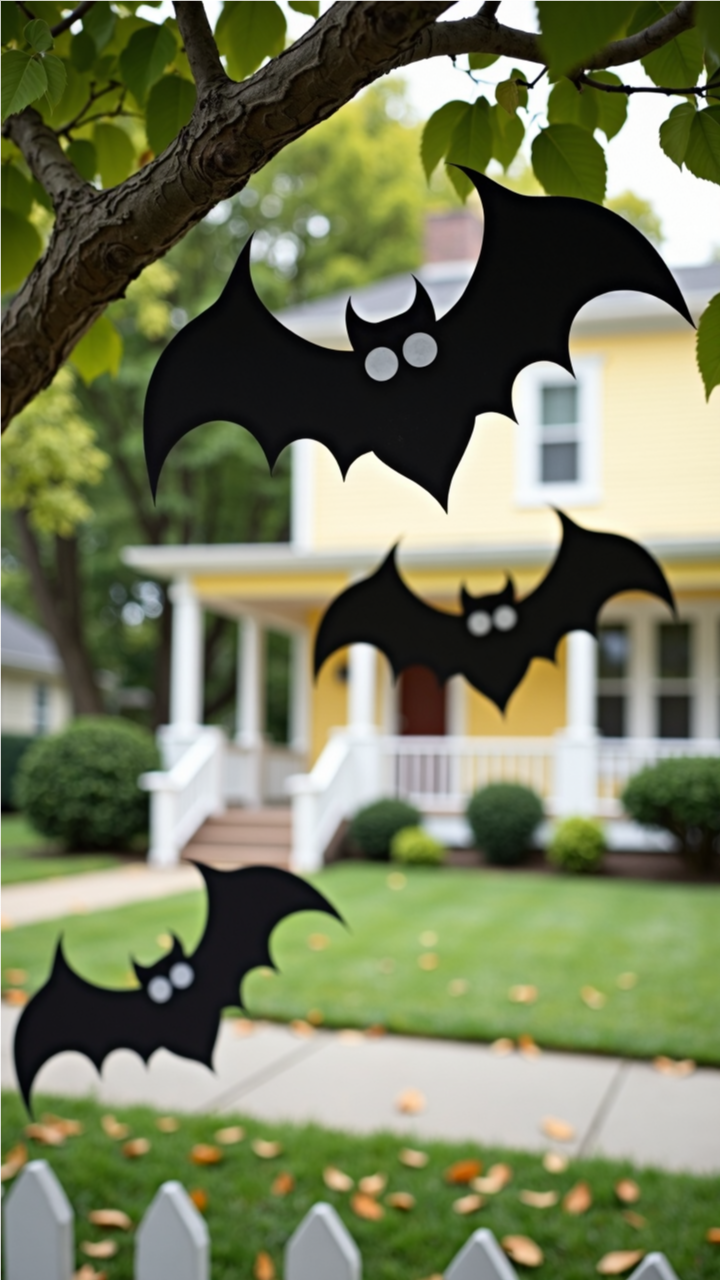
These creepy bats also make a wonderful Halloween craft for kids – as well as making your porch look spook-tastic. You’ll need black craft foam, googly eyes and fishing line to make these upside down creatures.
If you’re looking for a simple yet eye-catching way to decorate your home for Halloween, these DIY hanging bats are the perfect solution! They create a spooky atmosphere and are easy to make with just a few supplies. Hang them from trees, porches, or fences for a hauntingly fun touch.
Supplies
Black cardstock or craft foam
White paper or stickers for eyes
Scissors
Hole punch
Fishing line or black string
Tape or glue
Printable bat template (optional)
Instructions
Create the Bat Shapes:
Use a printable bat template or draw bat silhouettes freehand on black cardstock or craft foam.
Cut out the bat shapes carefully.
Add the Eyes:
Cut small circles from white paper or use white stickers for the eyes.
Attach them with glue or tape to give your bats a fun and spooky look.
Punch a Hole:
Use a hole punch to create a small hole at the top of each bat’s wing.
Attach the String:
Cut pieces of fishing line or black string at varying lengths.
Thread through the hole and tie a knot to secure it.
Hang the Bats:
Choose trees, porches, or fences to hang your bats.
Use tape, pushpins, or hooks to secure them in place.
Let them dangle and sway in the wind for an eerie effect!
Tips for Extra Spookiness:
Use glow-in-the-dark paint on the eyes for a nighttime glow.
Make different sizes of bats for a dynamic effect.
Hang them at different heights for a realistic flying look.
2. BOO Halloween Sign

This rustic wooden sign is a perfect addition to your front porch, entryway, or any festive space. With just a few materials and a little creativity, you can craft a spooky and stylish decoration in no time.
Supplies
Wooden board (approximately 4-6 inches wide and 3-4 feet tall)
Black vinyl letters or black paint
Spider web stencil or printable template
Black paint or marker for the web design
Paintbrushes or sponge applicator (if painting letters and design)
Sandpaper (optional, for a distressed look)
Clear sealant (for outdoor protection)
Instructions
Prepare the Board:
If using a raw wooden board, sand it down for a smooth finish.
You can leave it natural for a rustic look or stain/paint it for a different effect.
Add the “BOO” Letters:
If using vinyl letters, carefully peel and stick them onto the board.
If painting, use a stencil or freehand the letters with black paint. Let dry completely.
Create the Spider Web Design:
Use a stencil or freehand a simple web in one corner with black paint or a marker.
Add a small painted or vinyl spider for extra creepiness.
Distress for a Rustic Look (Optional):
Lightly sand the edges and letters for a weathered appearance.
Seal for Protection:
If displaying outdoors, apply a clear sealant to protect against weather damage.
Display Your Sign:
Lean it against a wall, place it on a porch, or hang it for a welcoming Halloween touch!
3. Pumpkin Arch

Transform your front door into a spooky and festive Halloween masterpiece with this DIY Pumpkin Arch! This eye-catching decoration is perfect for setting the scene for trick-or-treaters and creating a fun and eerie entrance.
Supplies
Foam or plastic pumpkins (various sizes)
A sturdy arch frame (PVC pipes, wire frame, or a pre-made garden arch)
Hot glue gun and glue sticks
Zip ties or strong adhesive hooks
Carving tools or craft knife (if carving faces)
LED string lights (optional for added glow)
Black paint or markers (for drawing faces if using plain pumpkins)
Faux leaves or vines (for extra decoration)
Instructions
If your pumpkins don’t already have carved faces, use a craft knife or markers to add fun or spooky expressions.
For a glowing effect, place LED string lights inside or around the pumpkins.
Assemble the Arch Frame
Use PVC pipes or a wire frame to create an archway over your door.
If using a pre-made garden arch, ensure it is securely anchored to the ground or wall.
Attach the Pumpkins
Arrange the pumpkins along the arch frame, alternating sizes and designs for variety.
Secure them in place using zip ties, hot glue, or strong adhesive hooks.
Make sure they are evenly distributed for a balanced look.
Add Decorative Touches
Wrap faux vines or leaves around the arch for a more natural and festive feel.
Weave LED string lights through the pumpkins for an eerie nighttime glow.
Secure and Display
Double-check that all pumpkins and decorations are securely fastened.
Step back and make any necessary adjustments for symmetry and spacing.