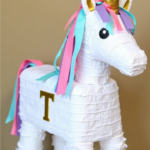
DIY Unicorn Photo Booth Frame

Make your next birthday party extra special with a DIY Unicorn Photo Booth Frame! This fun and whimsical frame adds a magical touch to any celebration, making for unforgettable photo moments. Follow this step-by-step guide to create your own unicorn-themed photo booth frame.
Supplies
- Large foam board or sturdy cardboard
- Box cutter or craft knife
- Gold, colorful, and glitter cardstock
- Adhesive vinyl or printable stickers
- Acrylic paints and brushes
- Ribbons in pastel colors (pink, purple, teal, blue, etc.)
- Hot glue gun and glue sticks
- Lettering stickers or paint pens
- Wooden dowel or PVC pipe (optional for stand support)
Instructions
Step 1: Cut the Frame Shape
- Start with a large foam board or sturdy cardboard.
- Using a ruler, measure and mark a rectangular cut-out in the center, leaving at least 4–6 inches around the edges for stability.
- Carefully cut out the center using a box cutter or craft knife.
Step 2: Decorate the Frame
- Paint the entire frame with a white or pastel base color and let it dry.
- Cut out unicorn shapes, stars, and other decorative elements from gold and colorful cardstock.
- Attach the cutouts around the frame using a glue stick or adhesive vinyl.
- Use paint pens or letter stickers to add text like “Happy Birthday [Name]” at the top and a personalized touch at the bottom.
Step 3: Add Ribbons for a Magical Effect
- Cut pastel-colored ribbons into equal lengths.
- Using a hot glue gun, attach the ribbons along the bottom edge of the frame for a dreamy cascading effect.
Step 4: Assemble the Stand (Optional)
- If you’d like the frame to stand independently, attach a wooden dowel or PVC pipe to the back using strong adhesive or zip ties.
- Secure it to a weighted base for stability.