DIY Unicorn Painted Rock
Looking for a fun and magical DIY craft? This unicorn-painted rock is a delightful project that brings creativity and charm into your home! Whether you’re a seasoned artist or just starting out, this step-by-step guide will help you create a vibrant and enchanting unicorn rock that makes for the perfect decoration, gift, or garden accent.
Supplies
Smooth, flat rock (clean and dry)
Acrylic paints (pink, white, yellow, blue, green, purple, and black)
Fine-tip paintbrushes
Paint pens (optional, for finer details)
Pencil for sketching
Sealer (mod podge or spray sealant)
Instructions
Step 1: Prepare Your Rock
Make sure your rock is clean and dry before painting. If needed, wash it with soap and water, then let it fully dry.
Step 2: Base Coat
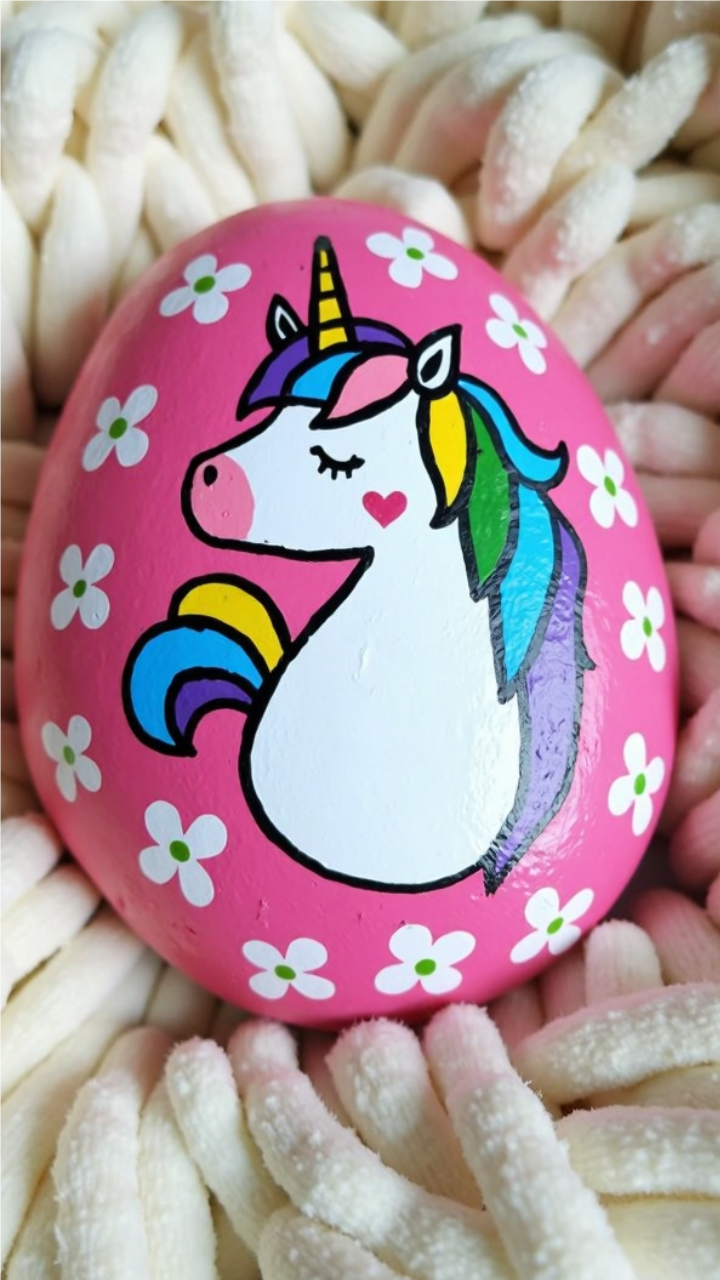
Paint the entire rock with a bright pink acrylic base. This will make the unicorn stand out and add a whimsical touch. Let it dry completely before moving on.
Step 3: Sketch the Unicorn
Using a pencil, lightly outline the shape of the unicorn’s head and mane. Keep it simple—just the profile of the unicorn with a flowing mane and a curved horn.
Step 4: Paint the Unicorn
Fill in the unicorn’s head with white paint. Let it dry, then use a black paint pen or fine-tip brush to outline the shape and add details like the eye, nose, and mouth.
Step 5: Add the Mane and Horn
Use bright colors like yellow, blue, green, and purple for the mane. Paint each section carefully, blending slightly if desired. Paint the horn golden yellow.
Step 6: Add Cute Details
Draw a small heart on the unicorn’s cheek for extra charm. To make your rock even more magical, add small white flowers with green centers around the edges.
Step 7: Seal Your Design
Once completely dry, seal your painted rock with a spray sealant or Mod Podge to protect it from chipping or fading.